The deluxe version of Wuren filling makes you fall in love with Wuren mooncakes in one bite!
2025-02-01 14:59:28 944
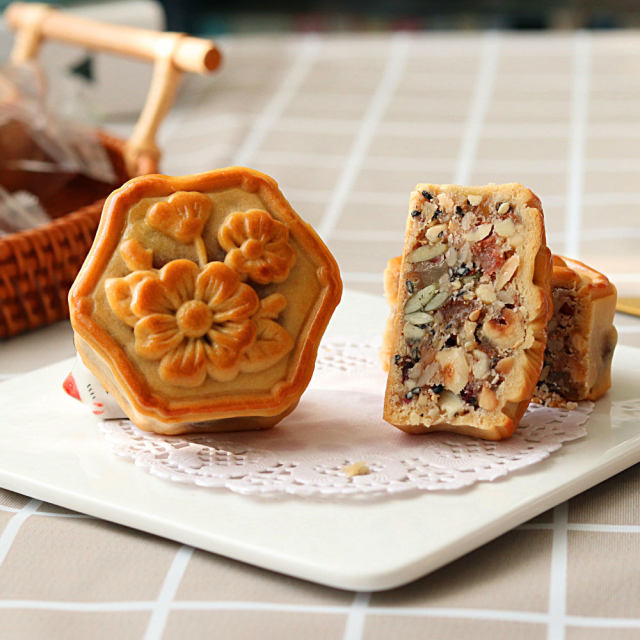
Nowadays, the "grade" of mooncakes on the market is getting higher and higher, but behind the excessive packaging, the taste is not so "liked", which is very disappointing to eat. In fact, having an oven at home and making homemade mooncakes is not very difficult, and the ingredients are real and delicious! Today, I would like to share with you a homemade five nut mooncake. The five nut filling is a luxurious version that I personally paired, and it's super delicious. Even people who are not very fond of mooncakes will want to try it.
Details of ingredients
Technique
Steps to make The deluxe version of Wuren filling makes you fall in love with Wuren mooncakes in one bite!
![]() 1. Prepare all the ingredients.
1. Prepare all the ingredients.![]() 2. Cut various dried fruits into small cubes and add whatever you like, there is no fixed one.
2. Cut various dried fruits into small cubes and add whatever you like, there is no fixed one.![]() 3. It's best to roast the nuts, as they will be particularly fragrant. (Nuts need to be roasted separately in size)
3. It's best to roast the nuts, as they will be particularly fragrant. (Nuts need to be roasted separately in size)![]() 4. Put the roasted large nuts into a compact bag.
4. Put the roasted large nuts into a compact bag.![]() 5. Use a rolling pin to break it into small particles without breaking it too much.
5. Use a rolling pin to break it into small particles without breaking it too much.![]() 6. Then put the prepared nuts and diced nuts into a large bowl and mix briefly for later use.
6. Then put the prepared nuts and diced nuts into a large bowl and mix briefly for later use.![]() 7. Stir the glutinous rice flour and low flour slowly in a non stick pan over low heat, and place them slightly cool.
7. Stir the glutinous rice flour and low flour slowly in a non stick pan over low heat, and place them slightly cool.![]() 8. Pour peanut oil and purified water into a small bowl and stir until emulsified.
8. Pour peanut oil and purified water into a small bowl and stir until emulsified.![]() 9. Then add honey, rum, and rose sauce and stir well.
9. Then add honey, rum, and rose sauce and stir well.![]() 10. Pour in the prepared nuts and diced nuts, quickly mix well.
10. Pour in the prepared nuts and diced nuts, quickly mix well.![]() 11. Add cooked glutinous Rice noodles and cooked low flour in batches, and mix each time until there is no dry flour before adding the next time. (Rub directly with gloves for large quantities)
11. Add cooked glutinous Rice noodles and cooked low flour in batches, and mix each time until there is no dry flour before adding the next time. (Rub directly with gloves for large quantities)![]() 12. After mixing, cover with plastic wrap and let it sit for half an hour.
12. After mixing, cover with plastic wrap and let it sit for half an hour.![]() 13. The method for making mooncake skins is still the same. Mix the syrup, rice water, and peanut oil evenly with a manual mixer until they are emulsified. Then, mix them evenly with all the sifted flour and use them after the dough is cooked.
13. The method for making mooncake skins is still the same. Mix the syrup, rice water, and peanut oil evenly with a manual mixer until they are emulsified. Then, mix them evenly with all the sifted flour and use them after the dough is cooked.![]() 14. Divide the filling into 50g portions. (Remember to cover the group with plastic wrap for later use)
14. Divide the filling into 50g portions. (Remember to cover the group with plastic wrap for later use)![]() 15. Divide the sorted dough into small pieces, each weighing 25g, and knead them into a ball for later use. The ratio of mooncake skin to filling can be 2:8 or 3:7, depending on personal preference, but it is recommended that the skin of the five nut filling not be too thin
15. Divide the sorted dough into small pieces, each weighing 25g, and knead them into a ball for later use. The ratio of mooncake skin to filling can be 2:8 or 3:7, depending on personal preference, but it is recommended that the skin of the five nut filling not be too thin![]() 16. Take out a piece of dough, knead it into a round ball shape, and flatten it with a scraper.
16. Take out a piece of dough, knead it into a round ball shape, and flatten it with a scraper.![]() 17. Pick it up and place it in the tiger's mouth with one hand, remember to wear PVC gloves! Place the prepared filling that has been kneaded into a round ball in the center of the dough, wrap the filling with a leather bag, and push it up bit by bit. Make sure your hands are light and not exposed, and try to make the dough evenly distributed. (After packaging, be sure to cover it with plastic wrap for later use!)
17. Pick it up and place it in the tiger's mouth with one hand, remember to wear PVC gloves! Place the prepared filling that has been kneaded into a round ball in the center of the dough, wrap the filling with a leather bag, and push it up bit by bit. Make sure your hands are light and not exposed, and try to make the dough evenly distributed. (After packaging, be sure to cover it with plastic wrap for later use!)![]() 18. Place the mooncake mold on the ball, hold the mold with your left hand, and press out the mooncake pattern twice with speed and force with your right hand. Immediately lift the mold to complete the process. (No need to repeatedly press, affecting aesthetics)
18. Place the mooncake mold on the ball, hold the mold with your left hand, and press out the mooncake pattern twice with speed and force with your right hand. Immediately lift the mold to complete the process. (No need to repeatedly press, affecting aesthetics)![]() Before entering the oven, gently spray a little water on the surface of the mooncake, then put it in an oven preheated at 210 degrees Celsius and 190 degrees Celsius (the best preheating time is 15-20 minutes) and bake for 6-8 minutes to set. (Oven temperature is not absolute, it depends on the temperament of the oven)
Before entering the oven, gently spray a little water on the surface of the mooncake, then put it in an oven preheated at 210 degrees Celsius and 190 degrees Celsius (the best preheating time is 15-20 minutes) and bake for 6-8 minutes to set. (Oven temperature is not absolute, it depends on the temperament of the oven)![]() After the first baking is completed, take it out and leave it at room temperature without burning your hands. Use a wool brush dipped in a small amount of egg yolk liquid, and quickly brush a layer of egg yolk water on the surface. Do not brush on the side, and be sure to control the egg yolk water from flowing to the side. Try to only apply a thin layer on the surface.
After the first baking is completed, take it out and leave it at room temperature without burning your hands. Use a wool brush dipped in a small amount of egg yolk liquid, and quickly brush a layer of egg yolk water on the surface. Do not brush on the side, and be sure to control the egg yolk water from flowing to the side. Try to only apply a thin layer on the surface.![]() 21. Re enter the preheated oven at 180 degrees for 12-15 minutes.
21. Re enter the preheated oven at 180 degrees for 12-15 minutes.![]() After baking again, take it out directly and transfer it to the cooling rack to let it dry until it reaches hand temperature before packaging. (The baked color is slightly heavier, and it looks more beautiful after oiling)
After baking again, take it out directly and transfer it to the cooling rack to let it dry until it reaches hand temperature before packaging. (The baked color is slightly heavier, and it looks more beautiful after oiling)


