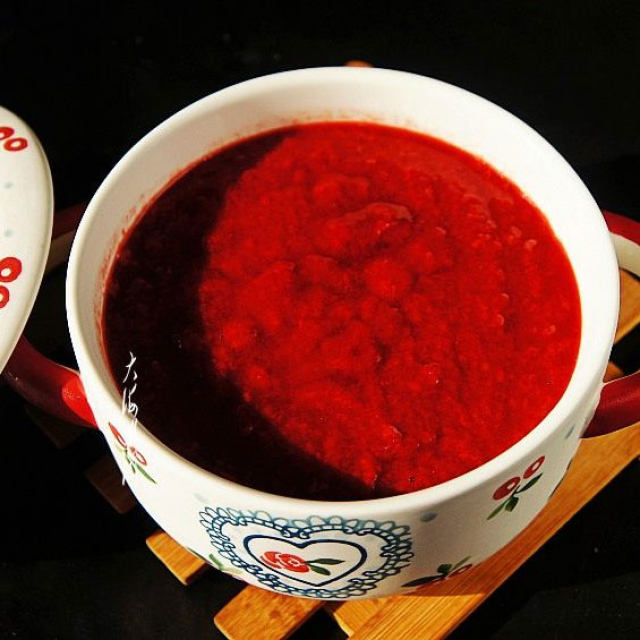
cherry jam
2024-10-22 02:59:19 513

You don't have to buy jam, it's healthier to make it yourself without any additives, and it's perfect for making fillings with breakfast. In summer, various fruits are on the market, and when they are affordable, I can't help but make jam myself. The biggest advantage is that there are no additives, no pigments, preservatives, or colorants, and the taste is pure and authentic. Family members can eat it with confidence, health, and safety.
Details of ingredients
Technique
Steps to make cherry jam
![]() 1. After picking cherries, they need to be re selected to remove bad fruit impurities. They should be soaked in diluted salt water for about half an hour to disinfect and check for any insects crawling out. There are always reports of insects, so you can rest assured if they have been treated. Then remove it and clean it several times to control the moisture content.
1. After picking cherries, they need to be re selected to remove bad fruit impurities. They should be soaked in diluted salt water for about half an hour to disinfect and check for any insects crawling out. There are always reports of insects, so you can rest assured if they have been treated. Then remove it and clean it several times to control the moisture content.![]() 2. Choose a larger and deeper pot, as the boiling process will cause the soup to burst outwards. Put cherries with controlled moisture into the pot and slowly cook over low heat without adding water. After boiling for a while, the soup will come out.
2. Choose a larger and deeper pot, as the boiling process will cause the soup to burst outwards. Put cherries with controlled moisture into the pot and slowly cook over low heat without adding water. After boiling for a while, the soup will come out.![]() 3. You can see that after boiling over low heat for a while, the cherries slowly melt and the soup comes out. Continue cooking.
3. You can see that after boiling over low heat for a while, the cherries slowly melt and the soup comes out. Continue cooking.![]() 4. Cook until the cherries are almost crushed and the soup is rich, then you can clean the cherry seeds.
4. Cook until the cherries are almost crushed and the soup is rich, then you can clean the cherry seeds.![]() 5. Use a spoon to scoop out the cherry seeds, which still have flesh on top. It feels like a pity to throw them away.
5. Use a spoon to scoop out the cherry seeds, which still have flesh on top. It feels like a pity to throw them away.![]() 6. You can also squeeze it with a spoon, and most of the fruit pulp can leak out. This is a delicate task that requires patience. While cooking, clean it up. Once cleaned, it's almost cooked.
6. You can also squeeze it with a spoon, and most of the fruit pulp can leak out. This is a delicate task that requires patience. While cooking, clean it up. Once cleaned, it's almost cooked.![]() 7. Boil it like this and it's almost done. Pay attention to constantly stirring with a shovel to avoid burning the pot!
7. Boil it like this and it's almost done. Pay attention to constantly stirring with a shovel to avoid burning the pot!![]() 8. Prepare an appropriate amount of white sugar, the amount of which depends on personal preference for taste. If the sweetness is higher, add more white sugar.
8. Prepare an appropriate amount of white sugar, the amount of which depends on personal preference for taste. If the sweetness is higher, add more white sugar.![]() 9. Pour the white sugar into the pre cooked cherry sauce, making sure to simmer over low heat and stir with a spatula to avoid burning the pot.
9. Pour the white sugar into the pre cooked cherry sauce, making sure to simmer over low heat and stir with a spatula to avoid burning the pot.![]() 10. Squeeze in lemon juice and add two spoons of salt, both of which can act as preservatives. Continue to simmer over low heat until viscous, then turn off the heat.
10. Squeeze in lemon juice and add two spoons of salt, both of which can act as preservatives. Continue to simmer over low heat until viscous, then turn off the heat.![]() 11. Slightly cool the sauce and seal it in a pre prepared container. Cool it thoroughly and refrigerate it in the refrigerator. Be sure to use a clean spoon to remove the sauce every time you eat.
11. Slightly cool the sauce and seal it in a pre prepared container. Cool it thoroughly and refrigerate it in the refrigerator. Be sure to use a clean spoon to remove the sauce every time you eat.


