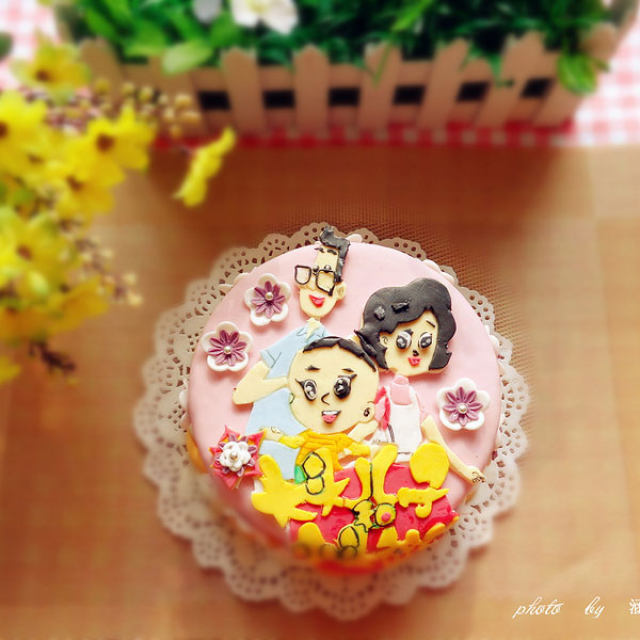
Sugar flipping cake
2024-05-02 14:59:23 337

I really like this family, and my son also loves this animated film. I want to make a cake and give it to my baby to make them happy. The first time I played flipping sugar, I made it a bit rough. I wanted the cake to be taller, so I used half a cocoa sponge cake and one heavy oil cake, both of which are six inches in size.
Details of ingredients
Technique
Steps to make Sugar flipping cake
![]() 1. Required tools
1. Required tools![]() 2. Apply a small amount of white oil to your hands, take an appropriate amount of sugar paste, and rub it with your hands until it is soft, smooth, and elastic. Use a rolling pin to roll it into thin slices
2. Apply a small amount of white oil to your hands, take an appropriate amount of sugar paste, and rub it with your hands until it is soft, smooth, and elastic. Use a rolling pin to roll it into thin slices![]() 3. Use a carving knife to carve out a rough outline
3. Use a carving knife to carve out a rough outline![]() 4. Take an appropriate amount of sugar cream and flip it over
4. Take an appropriate amount of sugar cream and flip it over![]() 5. Use a toothpick to add an appropriate amount of pigment, step by step
5. Use a toothpick to add an appropriate amount of pigment, step by step![]() 6. Mix the pigment and sugar cream evenly
6. Mix the pigment and sugar cream evenly![]() 7. Retrieve the desired color
7. Retrieve the desired color![]() 8. Carve out detailed drawings
8. Carve out detailed drawings![]() 9. Carve out various parts of the character
9. Carve out various parts of the character![]() 10. Use a sugar rolling pen to apply a little honey, assemble the carved parts, and make adjustments to the details
10. Use a sugar rolling pen to apply a little honey, assemble the carved parts, and make adjustments to the details![]() 11. Assembling the character section
11. Assembling the character section![]() 12. Remove the protruding part from the top of the heavy oil cake
12. Remove the protruding part from the top of the heavy oil cake![]() 13. Take half a sponge cake
13. Take half a sponge cake![]() 14. Spread chocolate sauce between two pieces
14. Spread chocolate sauce between two pieces![]() 15. Apply a layer of chocolate sauce on the top layer as well
15. Apply a layer of chocolate sauce on the top layer as well![]() 16. Color the sugar flipping cream on the main body of the cake and roll it out. The diameter should be greater than the value of the cake body plus the height on both sides
16. Color the sugar flipping cream on the main body of the cake and roll it out. The diameter should be greater than the value of the cake body plus the height on both sides![]() 17. Lay it on the cake body
17. Lay it on the cake body![]() 18. Smooth the surface and remove any excess parts from the bottom
18. Smooth the surface and remove any excess parts from the bottom![]() 19. Trim the surface a bit
19. Trim the surface a bit![]() 20. Take the white sugar cream and use a mold to press out the shape
20. Take the white sugar cream and use a mold to press out the shape![]() 21. Use a sugar flipping tool to press it to create a three-dimensional effect. I didn't buy a sponge pad, so I used a paper bag instead
21. Use a sugar flipping tool to press it to create a three-dimensional effect. I didn't buy a sponge pad, so I used a paper bag instead![]() 22. Take another flower mold and press out the shape
22. Take another flower mold and press out the shape![]() 23. Use sugar flipping tools to organize the shape
23. Use sugar flipping tools to organize the shape![]() 24. Combine them together with honey, place sugar beads in the middle, and let the flowers air dry and set into shape
24. Combine them together with honey, place sugar beads in the middle, and let the flowers air dry and set into shape![]() 25. Assemble all parts onto the cake body
25. Assemble all parts onto the cake body![]() 26. Finished products
26. Finished products![]() 27. Finished products
27. Finished products![]() 28. Incision
28. Incision


